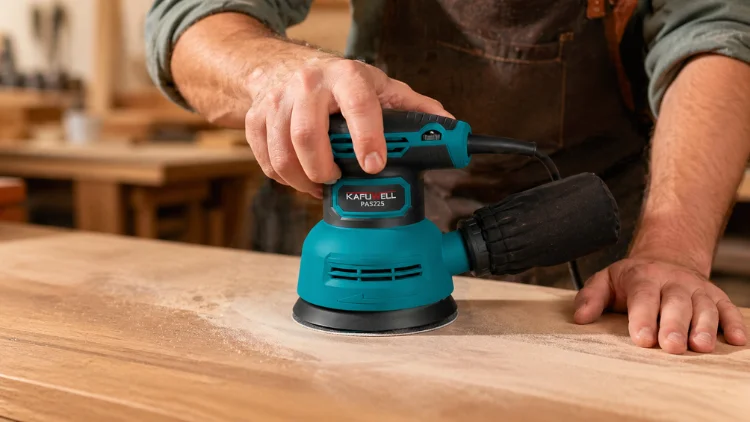
An orbital sander is one of the easiest power tools to use, but using it correctly can make the difference between a smooth, professional finish and a surface covered with swirl marks and uneven patches.
This article will explain how to use an orbital sander, helping you achieve consistent results from your very first sanding project.
What You Need Before You Start
Before you switch the tool on, make sure you have the right materials and safety gear within reach.
Tools and materials:
- Orbital sander (corded or cordless)
- Sandpaper in multiple grits (60, 80, 120, 180, 220)
- Dust bag or shop vacuum with hose attachment
- Tack cloth or clean rag for surface wipe-down
- Extension cord (if using a corded model)
Safety gear:
- Safety glasses
- Dust mask (N95 minimum, especially for drywall or paint)
- Hearing protection for extended sessions
- Work gloves (optional, but recommended for long sessions)
Taking two minutes to set this up properly saves a lot of frustration later.
How to Use an Orbital Sander: Step by Step
Step 1: Choose the Right Grit Sandpaper
Grit selection is the most important decision you make before sanding. The number on the sandpaper refers to how coarse or fine the abrasive is. Lower numbers are coarser and remove material faster; higher numbers are finer and produce a smoother finish.
A simple rule of thumb for most projects:
| Grit | Best For |
| 60–80 | Heavy material removal, stripping old paint or finish |
| 100–120 | General smoothing, removing previous grit scratches |
| 150–180 | Pre-finish sanding, smoothing between coats |
| 220+ | Final pass before staining, sealing, or painting |
Never jump more than one grit level at a time. Skipping from 80 to 220, for example, leaves deep scratches that are invisible until you apply a finish, at which point they become very obvious.
Step 2: Attach the Sandpaper Pad
Most orbital sanders use a hook-and-loop (Velcro-style) system, which makes pad changes quick and easy. Press the sandpaper firmly onto the pad, making sure it is centered and flat.
Pay attention to the dust holes. The holes in the sandpaper must align with the holes in the sanding pad. Misaligned holes block the dust extraction path, which means dust builds up on the surface, clogs the abrasive faster, and reduces sanding efficiency significantly.
Step 3: Set the Speed
Most orbital sanders include a variable speed dial, typically numbered 1 to 6 or displayed in OPM (orbits per minute). Match the speed to what you are doing:
- Low speed (1 to 2): Fine finishing work, sanding between coats of paint or varnish
- Medium speed (3 to 4): General-purpose sanding on wood or prepared surfaces
- High speed (5 to 6): Aggressive material removal, stripping paint, or working on rough surfaces
When in doubt, start at a lower speed. You can always increase it; you cannot undo a burn mark on wood from moving too fast.
Step 4: Position and Grip the Sander Correctly
Hold the sander with both hands. Most models have a top grip and a front or side handle. Keep the sanding pad completely flat against the surface before you turn the tool on.
Do not tilt the sander. When only the edge of the pad contacts the surface, it creates an uneven pressure point that gouges the material and leaves a visible ridge. The entire pad should be in contact with the surface at all times during sanding.
Step 5: Start Sanding and Keep the Sander Moving
Turn the sander on before it touches the surface, then lower it gently onto the workpiece. Move the sander in slow, overlapping passes across the surface. A good pace is roughly 5 to 7 centimeters per second.
Two key rules to follow at all times:
Keep the sander moving. Holding it in one spot, even for a second or two, creates a circular depression that is very difficult to sand out afterward.
Let the tool do the work. Pressing down hard does not speed up the process. It overloads the motor, generates excess heat, and burns through sandpaper much faster than normal. Apply light, even pressure and allow the abrasive to do its job.
Work in manageable sections. On a large surface like a tabletop or floor panel, divide it into zones and complete each one before moving to the next.
Step 6: Progress Through the Grits
Once you have finished with one grit, wipe the surface clean with a dry cloth before moving to the next. This removes loose dust and abrasive particles that could scratch the surface when you switch to finer paper.
Inspect the surface under raking light (a light source held at a low angle) to check whether the previous grit’s scratch marks have been fully removed. If you can still see deep scratches, continue with the current grit before moving on. Rushing through grits is one of the most common reasons a finished surface looks rough under paint or stain.
Step 7: Finish and Inspect
After your final pass with the finest grit, turn off the sander and lift it away from the surface before it stops spinning. This prevents the pad from leaving a mark as it decelerates.
Wipe the surface with a tack cloth or a lightly dampened rag to remove all remaining dust. Then inspect the surface under raking light from multiple angles. Look for any swirl marks, missed areas, or uneven patches. If you find any, a quick pass with fine grit (220) will address them before you apply your finish.
Tips for Specific Surfaces
Wood Furniture and Floors
Wood is the most common application for an orbital sander. Work through the grit sequence methodically: 80, 120, 180, and 220 for a finish-ready surface. For the final one or two passes, move the sander slowly in the direction of the wood grain. Although the random orbit motion makes direction less critical than with a belt sander, finishing with the grain produces the cleanest result before staining or sealing.
Drywall and Plaster
Yes, you can use an orbital sander on drywall, and it is one of the fastest ways to smooth joint compound or feather seams. Use 100 to 120 grit and always attach a vacuum to manage the fine, airborne dust that drywall produces. Be careful not to sand too aggressively. The paper face of drywall is thin, and cutting through it creates a repair job that is harder to hide than the original imperfection.
Paint Removal
Start with 60 to 80 grit for stripping old paint. Work in sections and use overlapping passes rather than pressing down harder to speed things up. Once the paint is removed and you are working on bare material, switch to finer grits to prepare the surface for primer or a new finish.
Wet Sanding
An orbital sander can be used for wet sanding, provided you use waterproof silicon carbide sandpaper and your sander is rated for wet use. Wet sanding is common in automotive finishing, where it is used to smooth clear coat before buffing. Keep the surface wet throughout the process and work with fine grits (400 and above) to achieve a glass-smooth result.
Common Mistakes to Avoid
Pressing down too hard. Extra pressure does not remove material faster. It overheats the pad, burns the sandpaper, and can scorch wood. Use light, consistent pressure.
Stopping the sander on the surface. Always lift the sander off the surface before switching it off. If the pad is stationary when the motor stops, it will leave a circular mark that requires extra sanding to remove.
Skipping grit levels. Going from 80 grit directly to 220 leaves deep scratches that become visible under any transparent finish. Work through each grit level in order.
Using worn-out sandpaper. When sandpaper glazes over and stops cutting effectively, it generates heat without removing material. Change the pad as soon as you notice it is no longer biting into the surface.
Neglecting dust collection. Dust that accumulates on the surface gets caught between the pad and the workpiece, reducing sanding efficiency and causing uneven results. Use a dust bag or vacuum attachment and clear the surface regularly.
How to Maintain Your Orbital Sander
A well-maintained orbital sander lasts significantly longer and performs more consistently. A few habits make a real difference:
After every use: Empty or replace the dust bag. Clear the dust port with a brush or compressed air. Inspect the sanding pad for wear or damage; a worn pad no longer holds sandpaper flat and should be replaced.
Periodically: Check the power cord (on corded models) for cuts or fraying. On cordless models, store the battery at partial charge if you are not using the tool for an extended period. Wipe down the tool body with a dry cloth to remove dust from the vents.
Sandpaper: Change it as soon as it stops cutting efficiently. Running glazed sandpaper is the single most common cause of poor sanding results, and replacement pads are inexpensive compared to the time wasted on ineffective passes.
Frequently Asked Questions
Can You Use an Orbital Sander as a Polisher?
Yes, by swapping the sandpaper for a foam polishing or buffing pad. This works well for applying wax to wood furniture or buffing light scratches on paint.
Do You Sand with or Against the Grain?
For the early, coarser passes, the direction of movement matters less because the random orbit motion handles scratch patterns in all directions. For the final finishing passes on wood, moving with the grain produces the cleanest surface before staining or finishing.
How Long Does It Take to Sand a Surface?
It depends on the size, condition, and number of grits you are working through. As a practical benchmark: a standard interior door (each side) typically takes 20 to 30 minutes when working through three grit levels. A rough, paint-covered surface will take longer than a surface that only needs light finishing.
Conclusion
Using an orbital sander correctly comes down to a few consistent habits: choosing the right grit, keeping the sander moving, letting the tool do the work, and progressing through grits without rushing. With practice, it becomes one of the fastest and most satisfying tools to use on any finishing project.
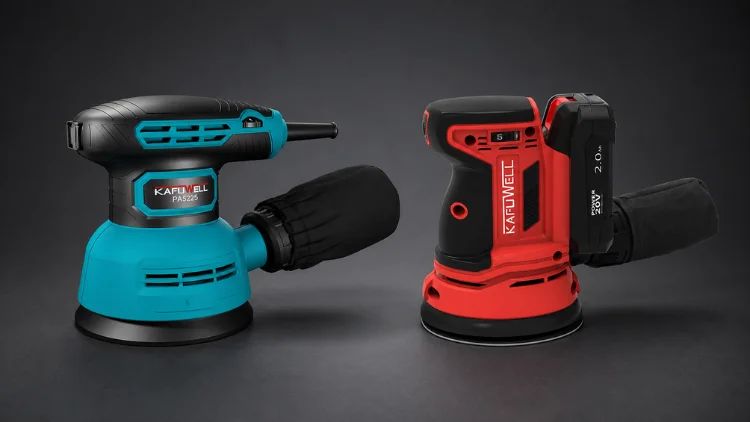
If you are looking for a reliable cordless orbital sander suitable for market distribution, the Kafuwell PA4235 20V Cordless Sander features hook-and-loop pad compatibility, variable speed control, and a built-in dust collection port. It is designed to meet the demands of both professional contractors and everyday DIY users, making it a practical option for distributors serving a broad customer base. You can also view our product catalog to explore more Kafuwell power tools.