An air compressor is a very practical tool for home garages, workshops, job sites, and small repair tasks. To use it safely and effectively, you need to understand the full process, from placing the machine and setting the pressure to connecting tools, shutting it down, and draining the tank. This article will guide you through the basic use of an air compressor in 8 steps.
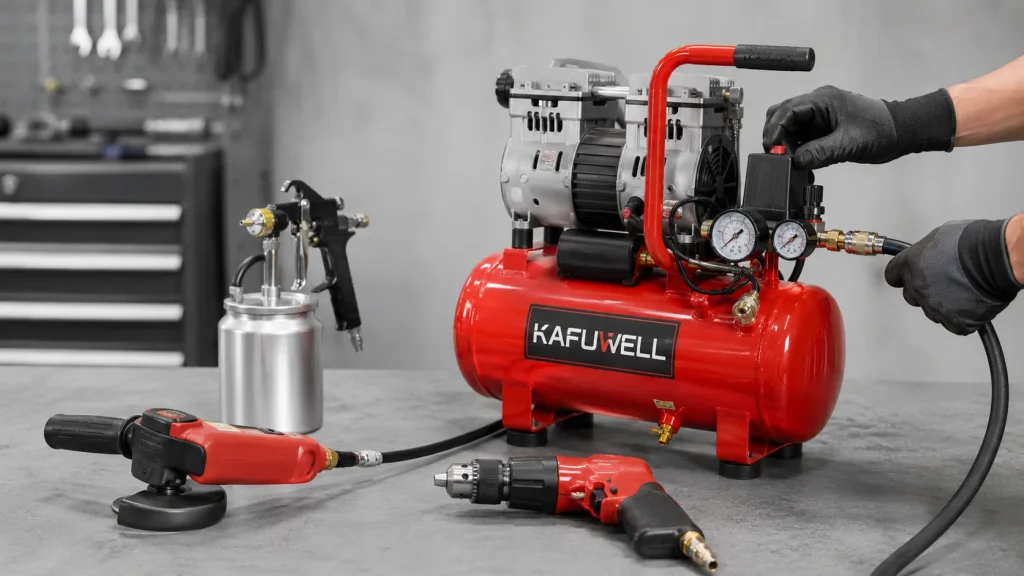
How to Use an Air Compressor in 8 Steps
Step 1: Position the Compressor
Place the compressor on a flat, stable surface in a well-ventilated area. The pump and motor generate heat during operation, so the unit needs enough airflow to stay cool. Leave at least 12 inches, or about 30 cm, of clearance around the compressor.
Keep the compressor away from flammable materials such as gasoline, paint solvents, sawdust, propane tanks, and open containers of chemicals. The motor and pressure switch may spark during startup.
Plug the compressor directly into a grounded outlet whenever possible. Avoid using a power extension cord unless your manual allows it and the cord is properly rated for the compressor’s amperage and length. In most cases, it is safer to extend the air hose instead of the power cord.
Safety note: Do not run a compressor on an incline, on a soft surface such as carpet or grass, or inside a closed cabinet. Poor airflow can cause overheating.
Step 2: Check the Oil Level
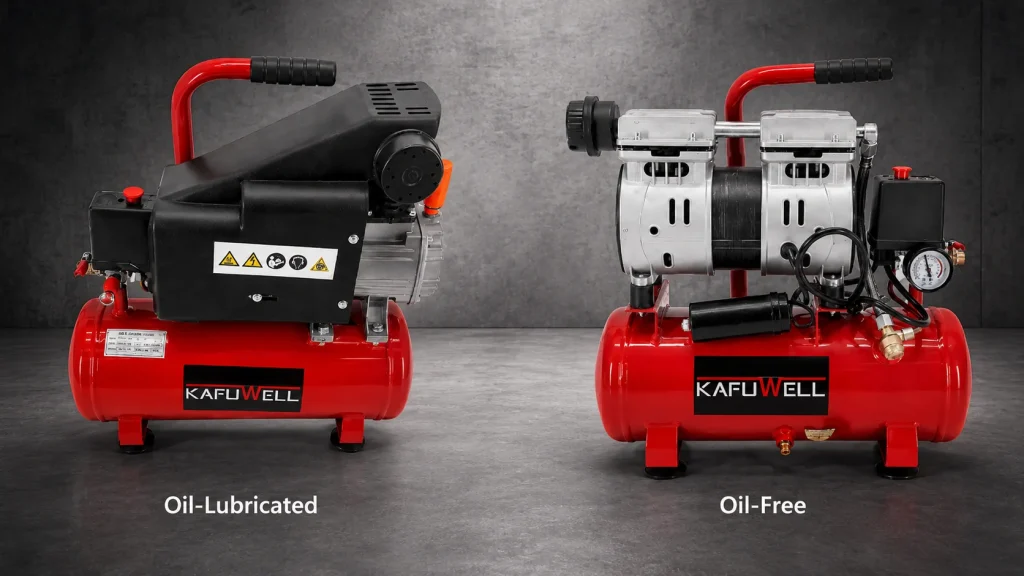
If your compressor is oil-lubricated, locate the oil sight glass or dipstick. It is usually on the side of the pump head. The oil level should sit between the minimum and maximum marks on the sight glass, or reach the correct line on the dipstick.
Use only the oil type recommended in the manual. Many oil-lubricated compressors require compressor-grade, non-detergent oil such as SAE 30 or ISO 100. Motor oil, hydraulic fluid, and household lubricants are not suitable substitutes.
If your compressor is oil-free, skip this step. Oil-free compressors do not require you to add compressor oil. Depending on the model, the pump may use factory-lubricated bearings, coated piston components, or other low-friction designs.
Safety note: Using the wrong oil can damage the pump quickly. If the oil type is unclear, check the manual before adding anything.
Step 3: Check the Drain Valve
Find the drain valve at the lowest point of the tank. It is usually a small valve on the bottom of the air receiver.
Before startup, make sure the drain valve is fully closed. If it is loose or slightly open, tighten it gently. Do not overtighten it because the threads can be damaged.
Safety note: Do not open the drain valve while the tank is under high pressure. When draining later, first bleed the tank down to a low pressure, usually below 10 PSI unless your manual says otherwise, then open the valve slowly.
Step 4: Power On and Build Pressure
Plug the compressor into a grounded outlet. Make sure the voltage and frequency match the compressor’s rating. A machine designed for 220 to 240V will not run correctly on a 110V outlet, and a 110V machine can be damaged if connected to a higher voltage supply.
Move the pressure switch to ON. The pump will start and the tank pressure gauge will begin to rise. The compressor will stop automatically when it reaches its cut-out pressure.
As a rough estimate, many small portable compressors take 1 to 3 minutes to build pressure from empty. Larger tanks may take longer. The exact time depends on tank size, motor power, pump output, target pressure, and ambient temperature.
Safety note: Stay near a new compressor during the first pressure build-up. If you hear unusual rattling, hissing, or vibration, turn it off and inspect the unit before continuing.
Step 5: Set the Regulator Pressure
Most compressors have two gauges. The tank pressure gauge shows how much pressure is stored in the tank. The regulated outlet pressure gauge shows the pressure being sent to your tool.
Find the regulator knob near the outlet coupler. Turn it clockwise to increase outlet pressure and counterclockwise to lower it. Set the outlet pressure to match the working pressure required by your tool.
Many air tools run around 90 PSI, but not all tools are the same. HVLP spray guns often use lower pressure, while framing nailers may require a higher range. Always check the tool label or manual before use.
Safety note: Do not exceed the tool’s rated working pressure. Too much pressure can damage seals, cause poor tool performance, or create a safety risk.
Step 6: Connect the Hose
If your hose or fitting uses threaded connections, wrap the male threads with PTFE thread seal tape before tightening. Two to three clockwise wraps are usually enough. This helps reduce air leaks at the joint.
For quick-connect couplers, pull back the collar on the female coupler, push the male plug in until it seats, then release the collar to lock the connection. Listen for hissing around the fitting. If air is leaking, disconnect and reseat the fitting or tighten the threaded joint.
With standard quick couplers, avoid disconnecting the hose while the air line is pressurized. Bleed tool-side pressure first and hold the hose firmly when disconnecting. A safety venting coupler can also reduce hose whip.
Safety note: A loose pressurized hose can move suddenly and cause injury. Keep control of the hose whenever connecting or disconnecting it.
Step 7: Connect Your Tool and Start Working
Attach the pneumatic tool to the open end of the hose using the same quick-connect process. If you are using an oil-lubricated air tool, such as many impact wrenches, ratchets, or sanders, add 2 to 3 drops of pneumatic tool oil into the tool’s air inlet before use.
Trigger the tool briefly to test the connection before starting real work. Watch the regulated pressure gauge while the tool is running. If pressure drops far below the set point during use, the compressor may be too small for that tool, or the tool may require more CFM than the compressor can supply continuously.
Safety note: Never point a pneumatic tool at yourself or another person. Keep your finger off the trigger until the tool is positioned on the work surface.
Step 8: Shut Down and Drain Moisture
When the job is finished, shut the compressor down in a controlled order.
- Disconnect the tool from the hose.
- Turn the pressure switch to OFF.
- Unplug the power cord.
- Bleed the tank down to a low pressure using the safety release valve or another method recommended in the manual.
- Open the drain valve slowly.
- Let water and air escape until flow stops.
- Close the drain valve.
- Coil the hose and let the compressor cool before storage.
Moisture forms naturally inside the tank because compressed air holds water vapor. Draining the tank after use helps reduce internal rust, protects downstream tools, and keeps the compressor in better condition.
Safety note: Do not store the compressor with high pressure left in the tank. Long-term pressure can stress seals, fittings, and welds.
Air Tool Pressure and CFM Quick Reference
After you know how to set outlet pressure, use the chart below to check whether your compressor can keep up with the tool you want to run. These are typical reference ranges. Always confirm the PSI and CFM rating printed on your specific tool or listed in its manual.
| Tool | Typical Working PSI | Typical CFM Required |
| Tire inflator for passenger cars | 30 to 35 | 0.5 to 1 |
| Brad nailer, 18 gauge | 60 to 100 | 0.3 to 0.7 |
| Finish nailer, 16 gauge | 80 to 100 | 0.8 to 1.5 |
| Framing nailer | 80 to 120 | 2.5 to 3 |
| Air ratchet, 3/8 inch | 90 | 3 to 4 |
| Impact wrench, 1/2 inch | 90 | 4 to 5 |
| Die grinder | 90 | 4 to 6 |
| HVLP spray gun, touch-up | 25 to 40 | 3 to 5 |
| HVLP spray gun, standard | 30 to 40 | 7 to 12 |
| Orbital sander | 90 | 6 to 9 |
| Cut-off tool | 90 | 4 to 5 |
If your tool requires more CFM than your compressor can deliver continuously, you may still be able to use it in short bursts. For continuous sanding, grinding, or spraying, however, an undersized compressor will fall behind and outlet pressure will drop.
5 Common Mistakes That Damage Air Compressors
1. Skipping the Daily Drain
Compressed air condenses water inside the tank. Without regular draining, the tank can rust from the inside, water can contaminate spray paint and downstream tools, and the tank’s structural integrity can decline over time.
2. Using a Power Extension Cord Instead of Extending the Hose
Long power cords can cause voltage drop. The motor may draw more current to compensate, overheat, and fail early. When possible, plug the compressor directly into a grounded outlet and extend the air hose instead.
3. Using an Undersized or Kinked Air Hose
A 1/4-inch hose connected to a 3/8-inch tool can cause a pressure drop before air reaches the tool. The compressor may cycle more often to compensate, the motor can wear faster, and the tool may underperform. Match the hose diameter to the tool’s air inlet, and avoid tight coils during use.
4. Running Beyond the Duty Cycle
Many portable compressors are rated for a 50% to 75% duty cycle, meaning they need rest periods between runs. Continuous use can trip the thermal cut-off, and repeated thermal events may shorten motor life.
5. Ignoring Early Warning Signs
Knocking, screeching, excessive vibration, or oil weeping from gaskets are warning signs, not quirks. A failing pump that is caught early can often be rebuilt for the cost of a piston ring kit. If the same pump is run for another month, it may need full replacement. When something sounds or looks wrong, shut down and inspect.
Frequently Asked Questions
Can I Use My Air Compressor Outdoors or in Cold Weather?
Most compressors can operate outdoors in moderate weather, but cold conditions can create problems. Below freezing, oil thickens, water condensation can freeze the drain valve shut, and rubber hoses can become brittle. If you must work in cold conditions, keep the compressor and hose indoors until just before use, and drain the tank immediately after the job is finished.
Why Does My Air Compressor Cycle On and Off When No Tool Is Connected?
Small leaks at fittings, the regulator, or the pressure switch can let tank pressure slowly drop. When pressure falls below the cut-in setting, the pump starts again. Use a soap-water test on each connection to find the leak, or check the pressure switch if the problem continues.
How Long Does It Take to Build Full Pressure from Empty?
A 9L portable unit may take about 60 to 90 seconds. A 30L unit may take 2 to 3 minutes. A 50L unit may take 3 to 5 minutes. Times vary with motor size, pump output, target pressure, and ambient temperature.
Do I Need to Break in a New Air Compressor Before Using It?
Some oil-lubricated compressors require a break-in period before first use. This may involve running the compressor with the drain valve open for 15 to 30 minutes to seat the piston rings and circulate oil. Oil-free models usually have different requirements, so always check your manual before first use.
Why Is the Air Coming Out of My Hose Damp and How Do I Fix It?
The water you see is usually the same condensation that collects in the tank. When you do not drain often enough, moisture can travel down the air line. The fix has three layers: drain the tank more often, install an inline water separator at the outlet, and add a desiccant filter before sensitive tools such as spray guns.
Conclusion
Air compressors look intimidating on day one, but the operating routine settles into muscle memory after a few uses. Position the unit, check oil and drain valve, build pressure, set the regulator, connect, work, shut down, drain. That is the loop. Build the discipline of daily draining and regular maintenance from the start, and your compressor will outlast most other tools in the shop.KAFUWELL designs and manufactures portable air compressors around this everyday workflow. We offer oil-free models for clean-air applications and oil-lubricated models for heavy-duty daily use, with capacities of 9L, 30L, and 50L. Our products are CE-certified and available worldwide. You can browse our air compressor lineup or contact our team for a quote.